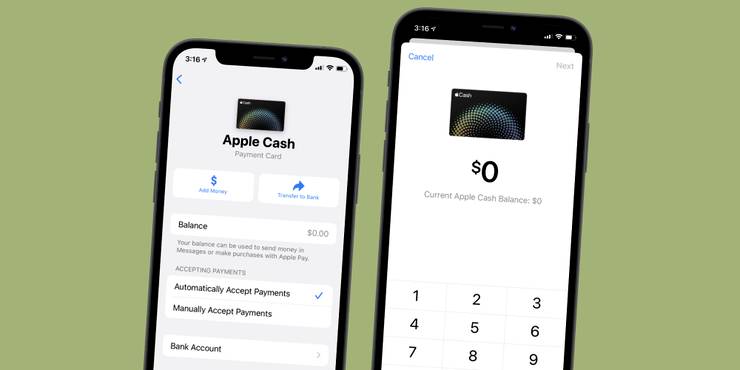
The Apple Cash card on the iPhone is a great way to send money to friends/family, especially thanks to how easy it is to transfer its money to a bank account. Over the last few years, peer-to-peer cash apps have become some of the most popular on the App Store. Whether it be Venmo, Cash App, Zelle, or something else, the rise of these applications has been fascinating to watch. Splitting a dinner bill with a friend? Pooling groceries together with a roommate? Just use one of these apps to send/request money from that person, call it a day, and that’s all there is to it.
While all of these apps are identical at their core, each one comes with unique advantages. Such is the case with Apple Cash. Apple Cash came to the iPhone in December 2017 and works exactly like the apps mentioned above — allowing users to send money to friends and request money from them. The main advantage to Apple Cash is that it’s integrated seamlessly throughout the Apple ecosystem. People can send money and make requests directly in iMessage, access Apple Cash from the Apple Watch, and any Daily Cash from the Apple Card is automatically added to Apple Cash card. For someone who spends a lot of time in the Apple bubble, it makes a lot of sense to also use Apple’s payment service over its many competitors.
As someone starts receiving money to their Apple Cash account, all of that resides in the virtual Apple Cash card in the Apple Wallet app. The card can be used just like any other debit card — but what if someone wants to transfer their Apple Cash funds to a bank account? Per Apple’s instructions, doing so takes just a couple of seconds. Open the Apple Wallet app, tap the Apple Cash card, and tap the three dots at the top-right of the screen. From this page, tap ‘Transfer to Bank,’ enter the amount to be transferred, tap ‘Next,’ and then choose which transfer method to use. Apple has two options available: an instant transfer with a debit card or waiting 1-3 business days using a checking account. Choose the preferred option, tap ‘Transfer’ at the top of the screen, and the transfer is complete.
Other Tips For Transferring Apple Cash To A Bank

While transferring Apple Cash funds to a bank account, there are a few pointers to keep in mind. One thing to consider is which transfer method someone should use. Getting those funds instantly with a debit card transfer is convenient, but similar to other apps, it does come with a small 1 percent fee — including a minimum of $0.25 and a maximum of $10. By comparison, checking account transfers are completely free to use. Waiting 1-3 business days for the transfer to clear can be annoying, but having the option to go either route is a nice convenience to have.
Something else to be aware of is how to update existing bank account information. If someone switches banks but doesn’t add that new info to their Apple Cash account, that can result in an unwanted headache. Open the Apple Wallet app, tap the Apple Cash card, tap the three-dots towards the top-right, and tap ‘Bank Account.’ Tap the bank listed on this page, re-enter the information if something has changed (such as the routing number), or tap ‘Delete Bank Account Information’ at the bottom of the screen and enter the new account details. Just keep these few things in mind and enjoy the smoothest Apple Cash experience possible.
Source: Apple
About The Author


